In this How-To I would like to show you how the administration of print servers works within a UCS domain. Printer management is a central component of UCS and allows you to manage printers and PDF printers in a UCS domain and set up policy-based print quotas in UCS.
Installing the Print Server (CUPS)
Printer management is a central component of Univention Corporate Server (UCS). You can use it to manage printer sharing and authorizations via the CUPS-based printing system (Common Unix Printing System) based on policies and independent of platforms.
Install the Print Server (CUPS) from the App Center. Alternatively you can directly use the software package “univention-printserver”. It includes CUPS and many drivers of known printer models and is set up for use in UCS.
For managing printer sharing, the Univention Management Console (UMC) features the “Printers” module in the “Devices” category, which allows easy printer management via the browser. The „Print Jobs“ module allows you to view the status of local printers and to manage print jobs.
Adding a PDF Print Server
Now I will show you how to add a PDF printer. The required drivers can be installed via the software package “univention-printserver-pdf”. The steps described below can similarly be used for real printers.
You can create new printer objects interactively in the Printer module. A click on the “Add” button in the top bar of the object list opens a wizard that requests all required information. As type select “Printer Sharing: Printer” and click on “Next”.
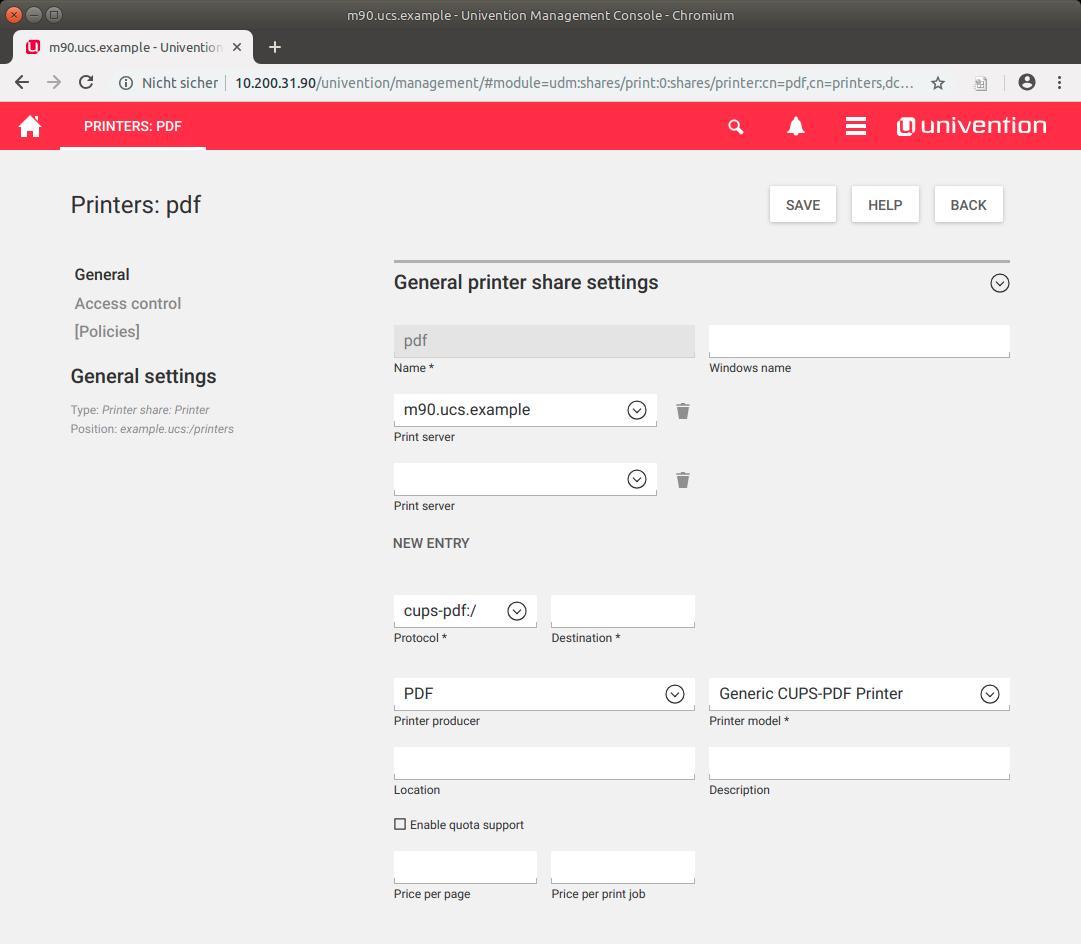
All required fields are marked with an *. As name for the printer you want to create, “pdf” can be set and as print server the desired server is selected. The protocol is cups-pdf:/ and a space is sufficient for the destination. After selecting the printer producer “PDF”, the printer model “Generic CUPS-PDF Printer” will be available for selection. Click on “Create Printer” to create the printer object.
Further information can be found in the manual in the chapter “Generating PDF documents from print jobs”.
Providing Printers
In order to use the printer, a Windows client must be part of a UCS domain. You can do this using the Active Directory-compatible Domain Controller app. At this point, take a look at the „How-To of the Client Administration with UCS“ . In this article we describe how you can add, manage, and join a UCS domain.
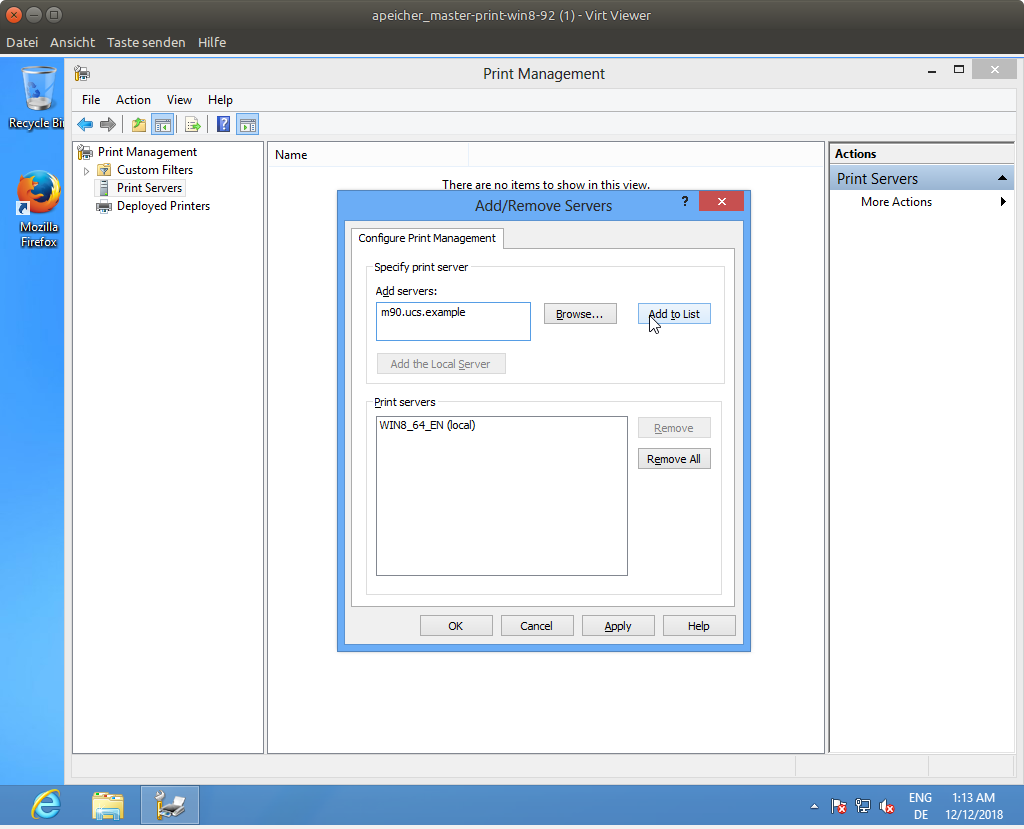
To make the printer and driver available to users on the Windows client, run the “printmanagement.msc” program as domain administrator. In the menu item “Action” one click on Add/Remove Server is sufficient to add another server. You must enter the full name of the print server in the “Add server” input field. This is the complete server name used to provide the printer.
When including printers on current Windows clients in Samba/AD domains, always use the FQDN, as Microsoft Windows requires this since the security updates for MS16-087 in order to make the automated printer driver installation according to the Point’n’Print mechanism more secure (see also the section under Additional Information).
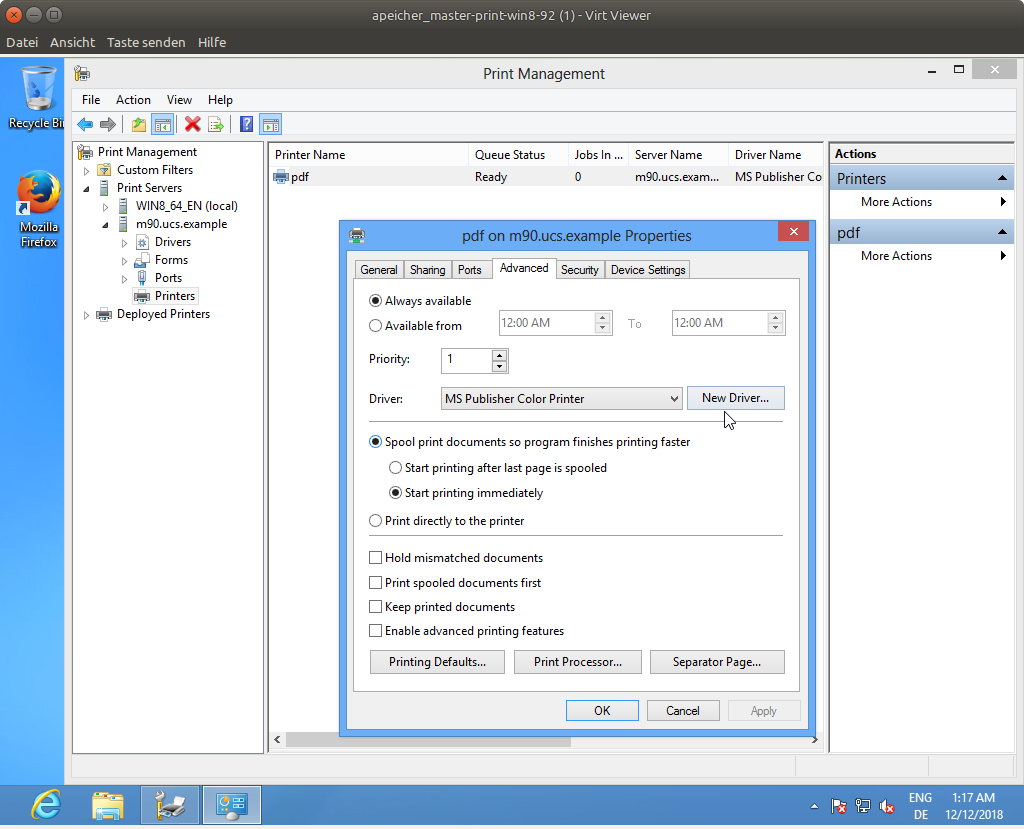
Now you search for the printer on the server, which is displayed here as “pdf”, and add it. Then add the printer driver. To do this, go to the “Properties” entry under the “Advanced” tab and click on “New driver”. For the PDF print server, select the “MS Publisher Color Printer” driver in the “Generic” area. The drivers are stored on the server side under /var/lib/samba/drivers/ in order to supply a Windows client with the correct drivers later.
Since the chronological order of the individual steps is important, at this point I refer you to the manual in chapter „Mounting of print shares in Windows clients“ . It also describes what to do in case of problems or how to change the format of the paper to DIN A4.
Using Printers in the Windows Client
The added printer can now be distributed to Windows clients via Windows Group Policy using an appropriate GPO. A second possibility is to execute a script for automatic printer integration when users log on. We have described the latter in the „Cool Solution – Printer assignment“ .
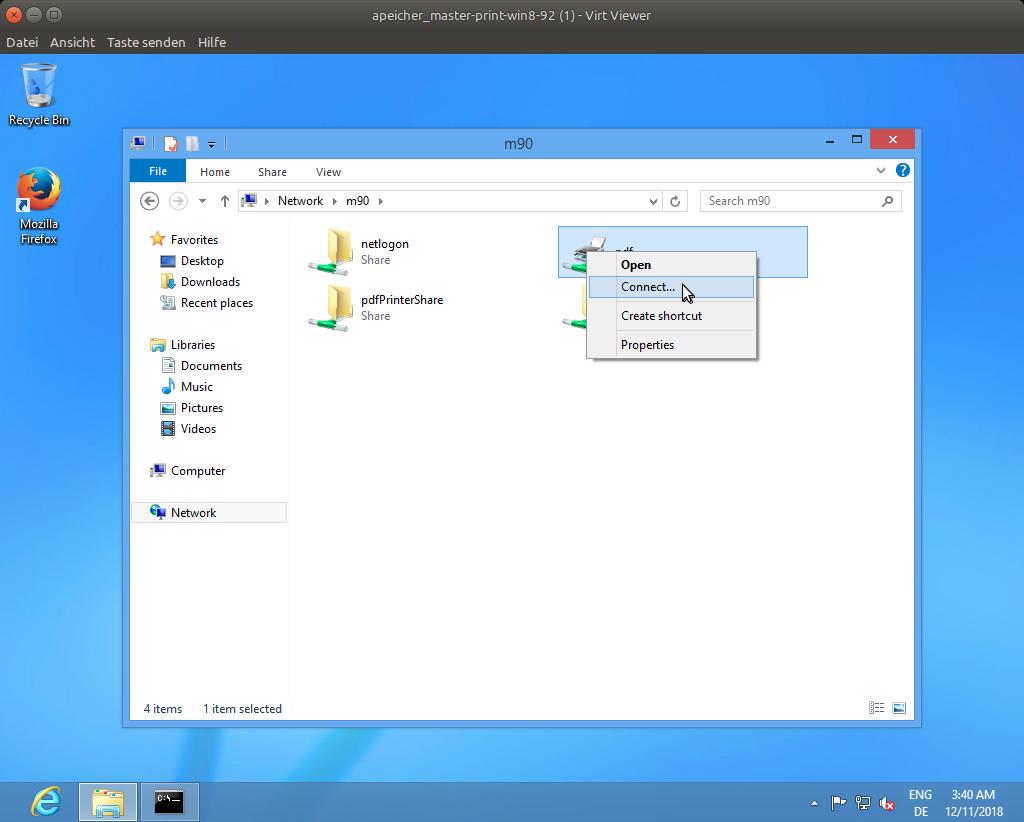
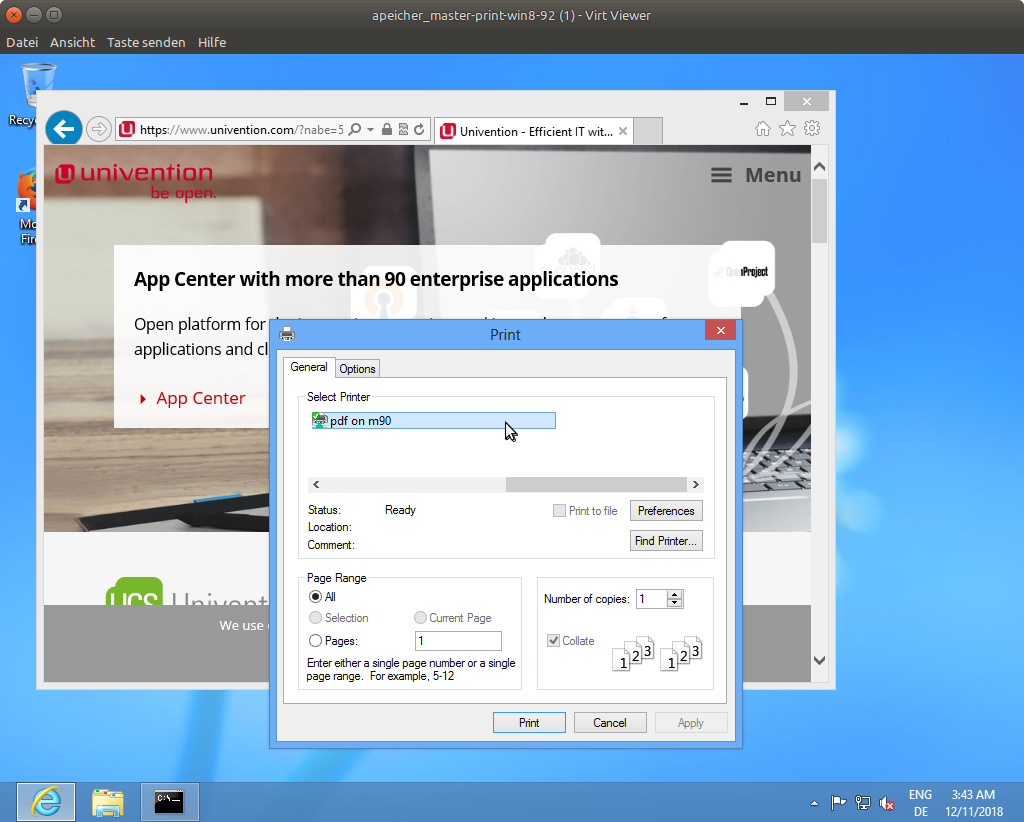
The third option you have is to add the printer manually through the user himself. In the network, the printer with its name “pdf” is released on the server under \\Servername. Here the user clicks with the right mouse button on the printer symbol and selects “Connect …” in the context menu. The drivers previously stored on the server are then downloaded and the printer is set up locally for the user. The printer can then be used immediately and is displayed as “pdf to server name”.
Should the drivers not be available on the server as described above, the user requires authorization to install their own drivers. This requires administrative rights. By activating the corresponding GPO, even non-administrators can install printer drivers .
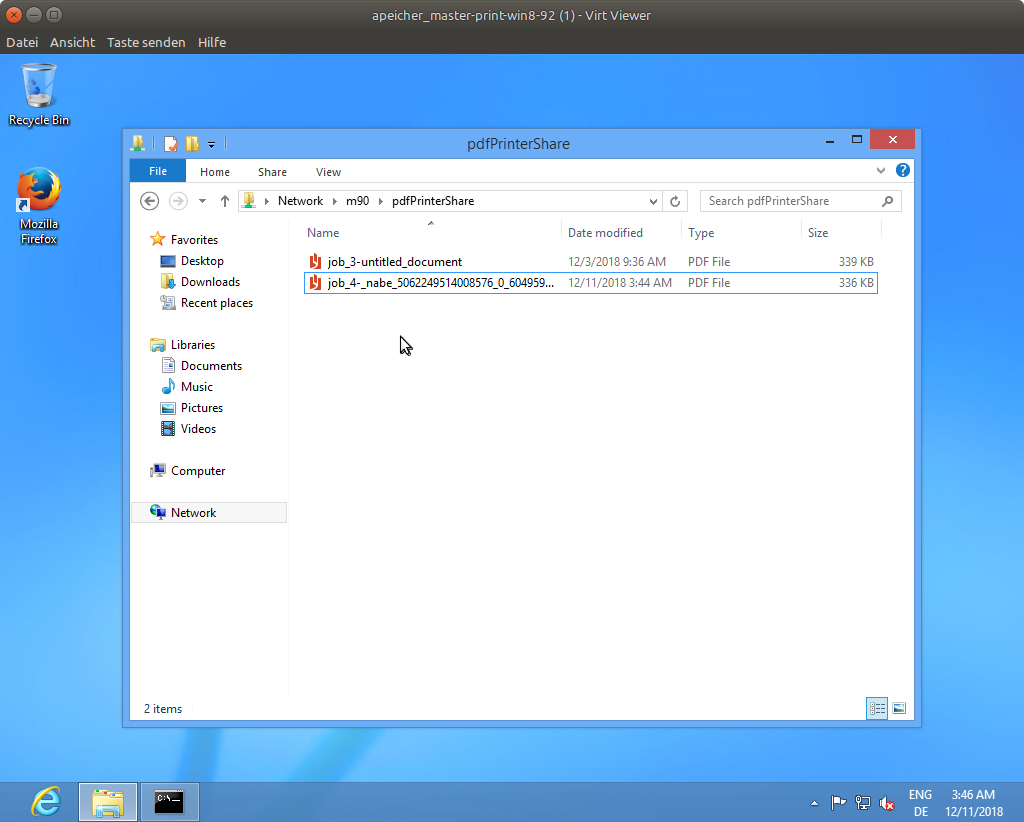
Printed pages are stored on the server in the directory/var/spool/cups-pdf/Benutzername, whereby the user name corresponds with the user logged on to the Windows client who sent the print job. This directory is automatically shared in the network under the path //Servername/pdfPrinterShare/, allowing a domain user to directly access their printed PDF files as soon as the first print job is placed there.
Managing Print Server Quota
To manage policy-based print quotas in UCS, you can use the software provided in the App Center„Print server Quota (pykota)“ . This enables you to set print server quotas on a basis of users or groups. Each time a print job is sent to the printer, it is checked in advance whether the user is authorized to print.
More documentation on the print server quota is described in our „Extended print services documentation“ .


Comments
canon printer repair
I really appreciate the information provided on this blog, this blog has provided me certain knowledge to deal with the issue that I am facing, I hope it will solve my issues