
In this How-To I would like to show you how the administration of client computers works in a UCS domain. Client administration is a central part of UCS, which makes it possible to fully benefit from the many advantages of a UCS domain.
Various client roles for computer objects
Client computers in UCS are managed with so-called computer objects. In this connection UCS distinguishes between different client roles. Depending on the client role, different settings can be made on the computer object.
The roles “Windows”, “MacOS” and “Ubuntu” are particularly interesting for the integration of workstations. Beyond that there is also “Linux” as a generic role for Linux systems that do not run with Ubuntu or UCS, and “IP-managed client”.
An “IP-managed client” is a device that does not fit into any of the other categories, but should still be provided with an IP address via DHCP. For example. Printers or VoIP telephones are typical devices that are managed with a computer object of the “IP managed client” role. This generic role enables a central administration of objects that goes far beyond the normal and defined range.
Creating and editing computer objects
The Univention Management Console (UMC) offers the module “Computer” for the management of computer objects in the “Devices” category, which enables simple computer management via the browser.
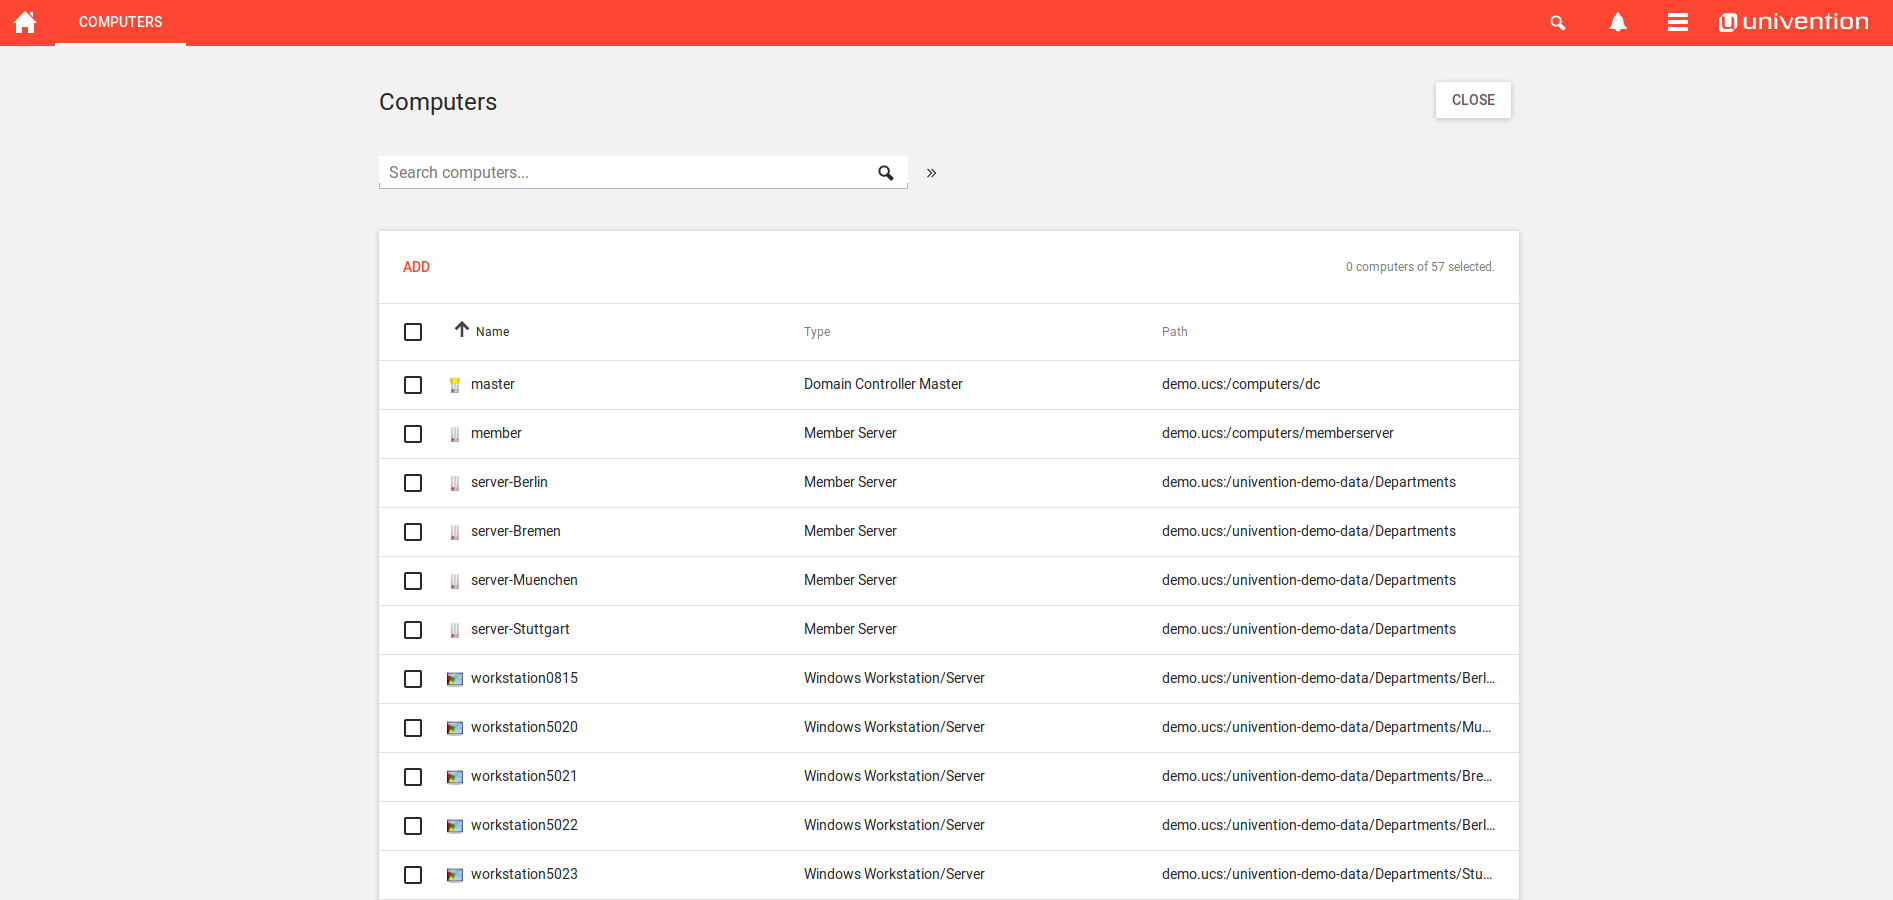
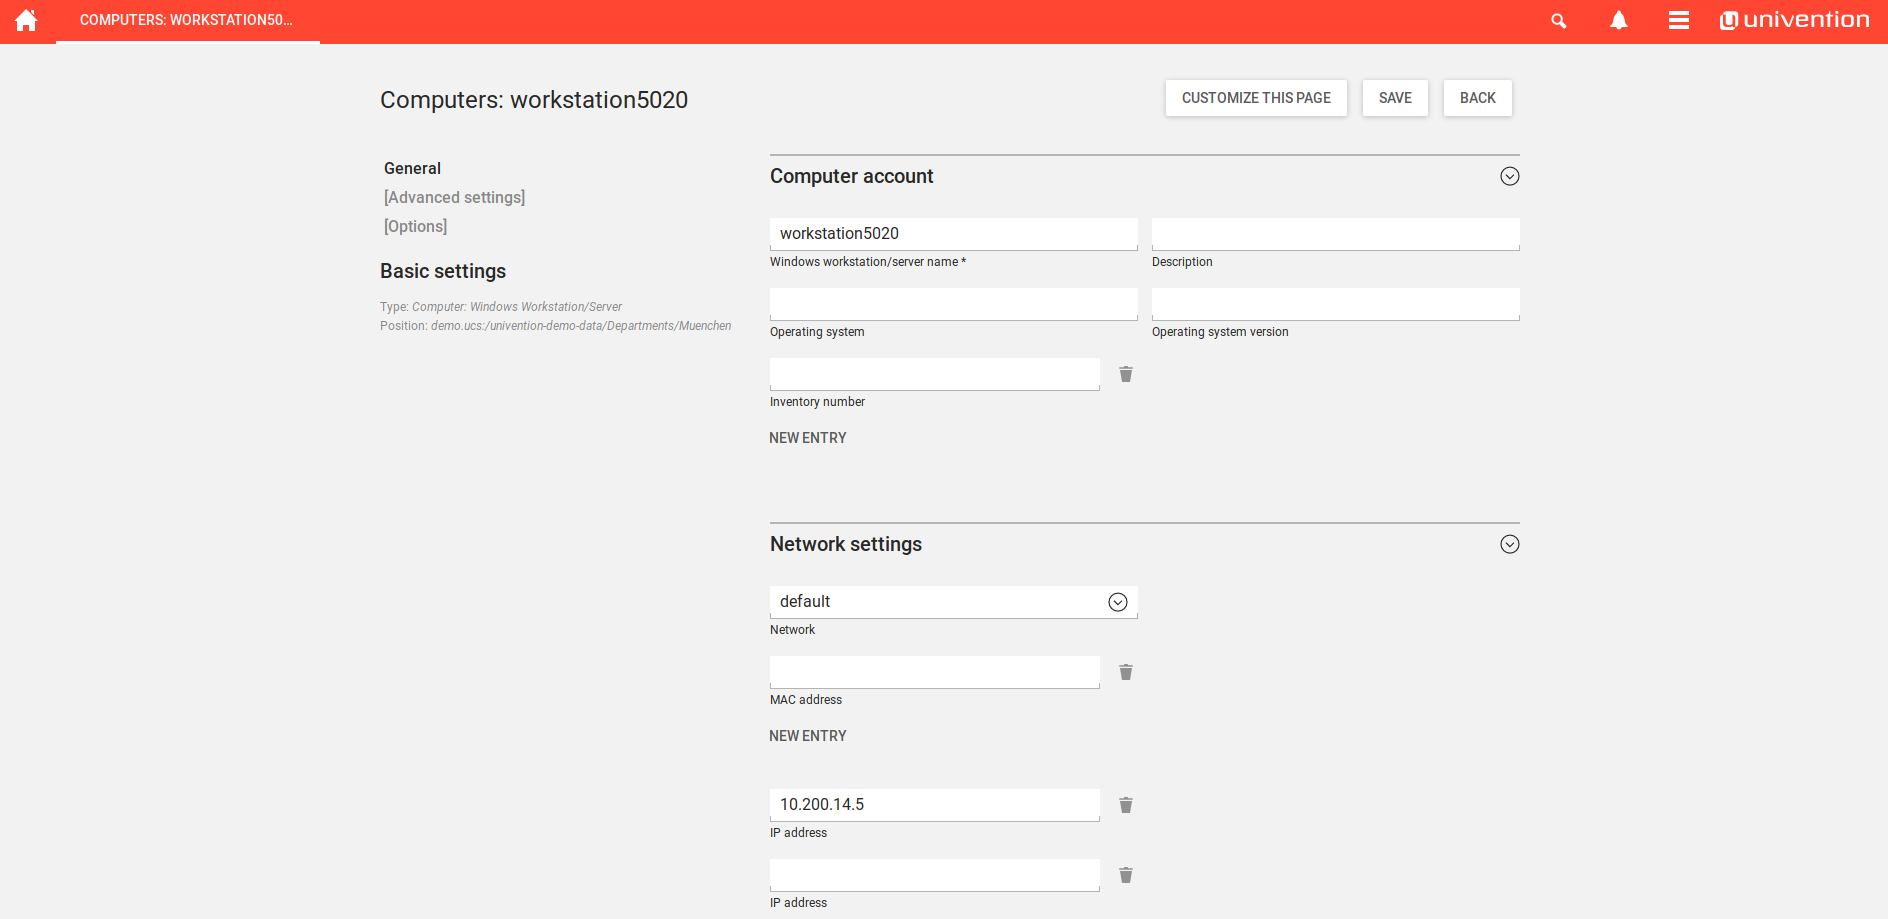
On opening the module, a list of all computer objects is displayed. The search bar in the upper area allows you to search for individual attributes such as a specific name, an IP address or a MAC address. You can open the computer object with one click and edit it directly, e.g. to assign a new IP address.
You can also create computer objects interactively in the computer module. A click on the “Add” button in the top bar of the object list opens a wizard that asks for all necessary information and points out any problems, such as a duplicate MAC address.
You can also create computer objects interactively in the computer module. A click on the “Add” button in the top bar of the object list opens a wizard that asks for all necessary information and points out any problems, such as a duplicate MAC address.If you want to create a new computer object, you must first select a container and a role (here called “Type”). The container “computers” is selected by default. Here you can, for example, use a container among another organizational unit to create an object for a certain location. To create an IP-managed client, select the corresponding role from the drop-down menu and click “Next”.
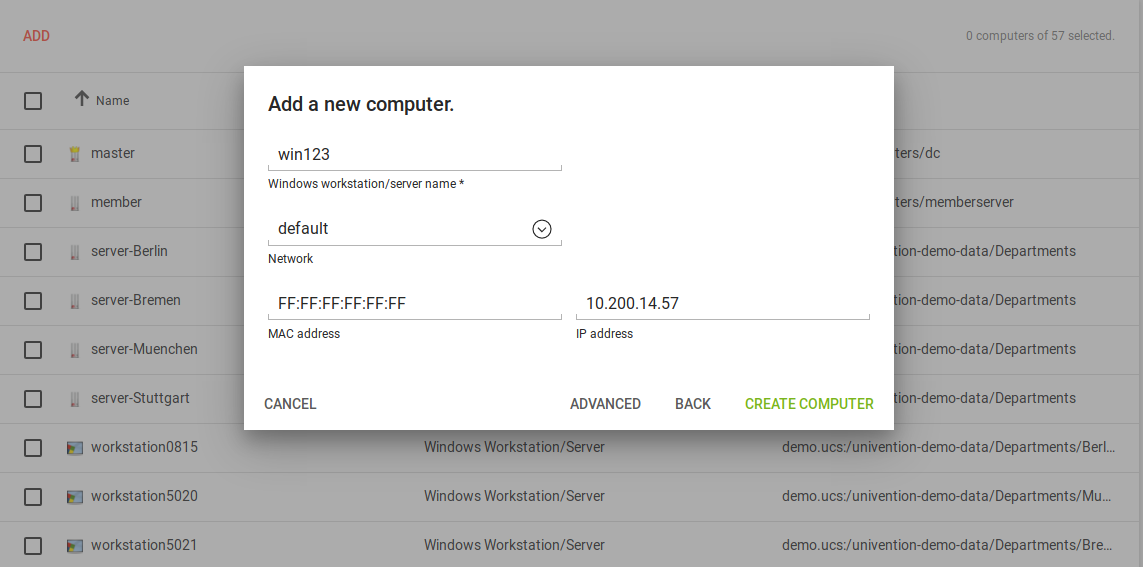
Subsequently enter a name for the object and enter a MAC and IP address as well as the desired network. The object is created by clicking on the button “Create computer”. With a click on “Advanced” you can switch directly from the wizard to the computer settings and thus make all further settings during the creation of the object.
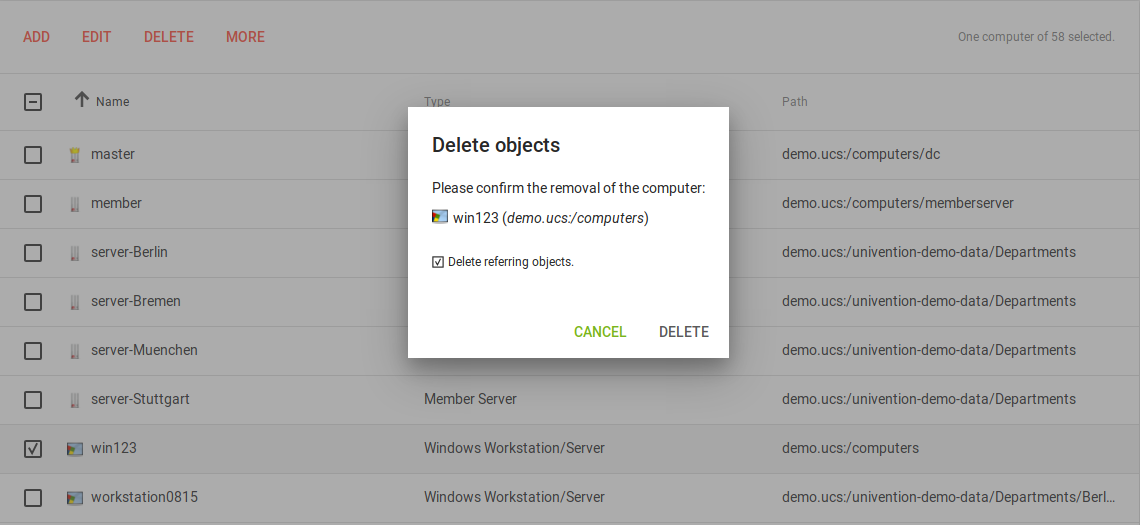
To delete a computer object, select it by clicking on the checkbox and remove it by clicking on “Delete”. You can also select several objects at the same time by clicking further checkboxes.
Adding Clients to the Domain
Now you know how to manually create clients in the domain. For clients running on Windows, MacOS or Ubuntu, it is also possible to enable them to automatically join the domain, in which a matching machine object is created.
Including Windows computers in a UCS domain
To include Windows machines in a UCS domain, you must install the Active Directory Compatible Domain Controller app from the UCS App Center. After you install the app, you must ensure that the machine can resolve hostnames in the UCS domain on the Windows machine. If the name resolution does not work, you should enter the UCS Master as the DNS server.

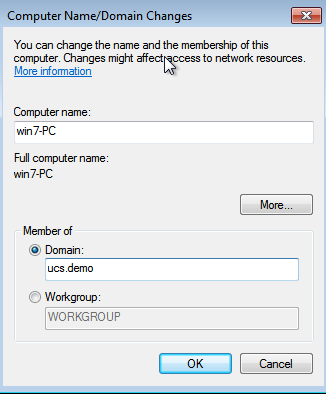
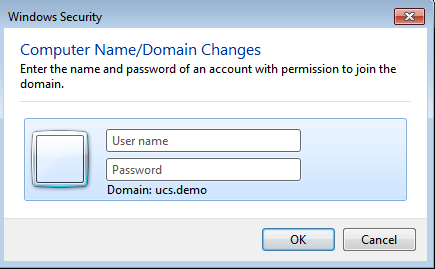
The domain accession can be started in Windows via the computer settings. You can do this by clicking on the Start button, then right-clicking on “Computer” and clicking on “Settings”. In the window that opens, click on “Change settings” next to the computer name and in the new window on the tab “Computer name” click on “Change”. Now you have to enter the desired name of the computer and the name of the domain. After clicking on “OK”, an attempt is made to find a domain controller via the name resolution. If this is successful, Windows asks for access data for a domain administrator. An account from the Domain Admins group, e.g. Administrator, must be used. After entering this data and clicking on “OK”, the domain accession starts. For more information, see the UCS documentation.

Creating MacOS Clients
In MacOS, domain accession is also possible through the user interface and, as with Windows, requires the installation of the Active Directory Compatible Domain Controller app. For more information about joining a domain, see the UCS documentation.
In the advanced settings of the Logon Options menu in MacOS, you should enable the option „Create Mobile Account on Login“ when joining a domain. This has the advantage that you can log in with the domain user ID even if you are not connected to the domain.
The domain name must now be entered in the “Active Directory Domain” field and the computer name of the Mac OS client in the “Computer ID” field. To join the domain, click on “OK”. For domain accession, an account from the group Domain Admins must be used again.
Ubuntu Clients
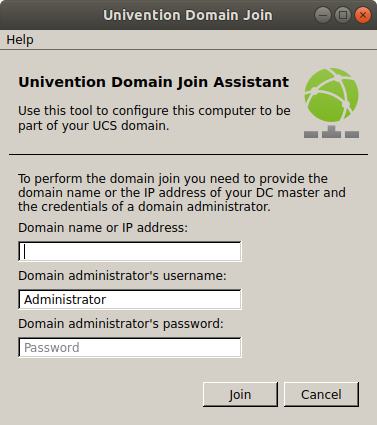 For easy integration of Ubuntu computers we have developed the “Domain Join Assistant”. These instructions describe how to download and install it on a Ubuntu computer. When you start the wizard, a window opens in which the host name or IP of the UCS master of the domain, as well as the user name and password of an administrator account are queried. After you have made these entries, start joining by clicking on the “Join” button.
DNS and DHCP for clients
DHCP
UCS offers a comfortable, central administration of DNS and DHCP via the web interface UMC. To do this, install the DHCP server app from the Univention App Center.
When the app is installed, a DHCP service for the domain is created in the DHCP module under “Domain”, which you can now use to assign IP addresses. The module allows you to define new DHCP subnets and address pools.
It is also possible to permanently assign IP addresses to computer objects and thus ensure that these computers always receive the respective IP address. To do this, switch to the computer module, open the respective computer object and enter an IP address and, if not already done, a MAC address in the “Network settings” area.
Then scroll all the way down to the “DHCP” area. There you can now select a DHCP service as well as a registered IP address and a MAC address to be associated with the device.

DNS
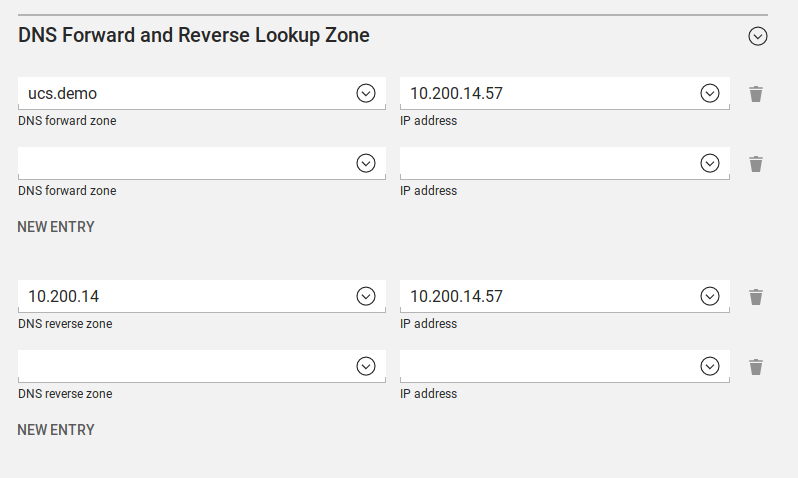
The configuration of the DNS server that UCS already brings with it is possible via the “DNS” module in the “Domain” category. There you can create different DNS zones and create them in these DNS records. To enable clients to use these zones, they must be configured in the computer settings. By default, the installation of UCS creates a DNS zone with the name of the domain and links it to new computer objects.
I hope this How-To article has given you a good insight into client administration with UCS. In the other articles of this series, my colleagues have dealt with the topics user administration and group administration in UCS.
More articles from this series:

