The cumulative outages of the Amazon Web Services and the attacks on the global DNS network have shown that even large and supposedly professionally protected networks are endangered, too. These incidents also make us aware of the need to distribute critical infrastructures across multiple cloud providers. This distribution is particularly important for centralized authentication services, which provide users and permissions for various services and organizational offices. An outage of a single server system would be a catastrophe for services like AWS where thousands of users and their permissions would be affected simultaneously. This is why I would like to explain to you how you can safeguard your network against outages and criminal attacks. Even if the dimension of your network probably is not comparable to the one of AWS or the DNS network.
Using a multi-server setup protects the network from the failure of a single data center and allows a continued operation even if a single server is unavailable. At the same time, using locations that are, from a network perspective, closer to your workstations, can speed up the login process and enable a more efficient usage of time. At the same time, an incorrect setup can at best slow down the network. At the worst, it might not replicate the data correctly, and thus an outage of one server might cause an interruption of all systems.
The following article explains how to extend the network by an additional Samba 4 based site server. I will lead you through the step by step process and explain the best practices of running a multi-server installation.
This guide can be used to connect two on-premises Samba 4 installation or an on-premises installation with a cloud-based one, for example, Univention Corporate Server on AWS. A valuable complement to this topic is the the article OpenVPN to Secure your Samba Authentications Automatically, where I explain how to connect clients to cloud based Samba 4 domain controllers.
Prerequisites
Server 1
This guide assumes that the first Samba 4 domain controller is already running without any issue. In this case based on Univention Corporate Server (UCS). UCS provides a powerful, yet easy to use identity management solution that includes a preconfigured Samba 4. UCS’ unified user and rights management solution is based upon a domain concept that will allow you to skip some of the steps within this guide. If you are using this guide for a UCS-based system, the server 1 should be a UCS master or backup.
The server or virtual machine will need to use a fixed IP for this guide to work flawlessly..
Server 2
We will also assume that you have setup the second server at the target location. If using UCS, it will be considerably easier to finish the installation once the VPN connection has been established. Also disable the automatic join, as we want to change some of the site settings.
VPN Endpoints
For simplicity, this guide assumes that the VPN is running on two dedicated servers, thus reducing the load on the domain controllers. It, however, is possible to run OpenVPN on the domain controllers.
First Step: Setup of a VPN Connection
We first look at the two VPN servers to establish the connection between the two.
Installation
Samba uses multiple ports and protocols to connect two or more servers, including LDAP, Kerberos, and DNS. Using a VPN allows reducing the number of ports and protocols exposed to the Internet to two, thus making securing the connection considerably easier. We will use OpenVPN to connect the two systems. More information on this can be found again in the already above mentioned article OpenVPN to Secure your Samba Authentications Automatically
If not installed already, you can install it with the following command:
$ sudo apt-get install openvpn
Considering that in most cases port 1194 is used for client-server connections, this example will use 1195 for the connection, which consequently needs to be opened in the firewall.
On UCS based systems the configuration registry can be used to open the port
$ sudo ucr set security/packetfilter/udp/1195/all=ACCEPT
$ sudo service univention-firewall restart
Configuration
First, a secret key is needed to connect the two sites. OpenVPN can create it for you using the command
$ sudo openvpn --genkey --secret /etc/openvpn/static.key
Both sides will need nearly identical configuration files saved in /etc/openvpn
## Topology and protocol settings
dev tun
proto udp
management /var/run/management-udp unix

## the shared secret for the connection
secret /etc/openvpn/static.key

## Encryption Cypher to use for the VPN
cipher AES-256-CBC

## Compression algorithm to use
comp-lzo

## The port on which the VPN Server should listen on
port 1195

## The address used internally by OpenVPN
ifconfig 10.255.255.10 10.255.255.11

## Route traffic to remote network
## The network should be the one, used by the remote server
route 10.200.10.0 255.255.255.0

## Additional server configuration
keepalive 10 120
persist-key
persist-tun

## Configure the logfile and the verbosity
verb 1
mute 5
status /var/log/openvpn-status.log
For the second server, the route has to match the respectively other network and the addresses in ifconfig statement have to be switched. Additionally, the keyword remote has to be used to denote the endpoint. The full resulting config file thus looks like this:
## Topology and protocol settings
dev tun
proto udp
management /var/run/management-udp unix

## the shared secret for the connection
secret /etc/openvpn/static.key

## Encryption Cypher to use for the VPN
cipher AES-256-CBC

## Compression algorithm to use
comp-lzo

## The external DNS name or IP of the other VPN
remote vpnserver.univention.com/ 1195

## The address used internally by OpenVPN
ifconfig 10.255.255.11 10.255.255.10

## Route traffic to remote network
## The network should be the one, used by the remote server
route 10.200.10.0 255.255.255.0

## Additional server configuration
keepalive 10 120
persist-key
persist-tun

## Configure the logfile and the verbosity
verb 1
mute 5
status /var/log/openvpn-status.log
Completing the Connection
Once the static key and configuration are copied to the correct location, establish the VPN connection by restarting VPN on both systems.
$ sudo service openvpn restart
Changes to Server 1
Once the VPN is established, it is time to join the second server to the domain. For this, some small changes are needed on the first server.
First, server one should use server two as the backup name server. In this case, even when there is an issue with DNS on the first server, the domain should still function correctly.
To set the name resolution on UCS execute:
$ sudo ucr set nameserver2=10.200.10.11
Please replace the IP with the appropriate entry.
Join von Server 2
Preparations
Similar to the server 1, server 2 should also use the other system as DNS fallback.
Again on UCS execute the following with the proper IP:
$ sudo ucr set nameserver2=10.210.237.171
You also need to ensure that the NTP is getting the time from server 1 to guarantee that both systems have a synchronized clock.
On UCS, using the right IP, run:
$ sudo ucr set timeserver=10.210.237.171
Once all the previous steps have been taken, it is time to join the Samba domain, including setting a new AD-site. Sites give a preference for a certain client to prefer a particular DC or group of DCs. If no site is configured, the server will join the default site.
To define the site on UCS run:
ucr set samba4/join/site=secondsite
Domain Join
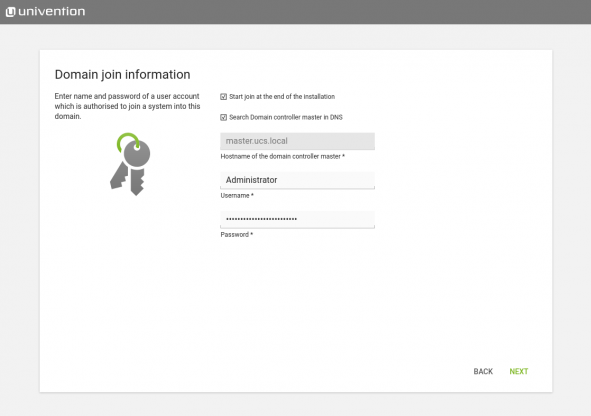
Now it is time to join the second server to the domain, before you can finish the installation of your new, safe server environment succesfully. Execute this as follows:
$ sudo univention-join
Conclusion
I hope this step by step instruction was able to help you to set up a multi-location server environment. Setting it up can be a daunting task at first that requires some consideration and planning. However, the result of having a more robust and faster network is often enough to justify placing domain controllers offsite or in the cloud. Additionally, a further cloud component in your identity management solution, no matter whether a second cloud DC or your first one, can often serve as the point to connect third-party services in a resilient manner.
The right tools, such as UCS can accelerate many of the more complex tasks of setting up a multi-server domain. A professional and integrated domain ensures compliant and fail-safe authentication and policy services across locations and clouds, such as AWS.


