
Quick question: when an employee leaves your or your customers’ company, how many systems do you have to touch to disable all of their IT access rights? If your answer is more than one, you should think about introducing or improving an Identity Management System. An Identity Management System, in short IdM, takes care of your employees, their authentication, and the roles and privileges they have within your IT environment. However, adding an IdM is often seen as a difficult task. This does not have to be the case! Thus, let me show you how you can quickly introduce UCS as your identity management system while keeping most of your services intact.
Identity Management System (IDM) – Access Control and a Consistent Database
Many companies continue growing together with their IT environment and administrators are often late in realizing how many services have been added over time: First an e-mail system, then file sharing and, of course, there are always notebooks or desktops for every employee. Each of these services is developing independently of the other or on small islands of two or three services, and for each, you have to add new users . This also implies that each user has a password for each service.
With the growth of the business come compliance requirements. Your HR Data need to be separate from the finances, and your engineering staff should see neither of them. Once set up, an IdM automatically takes care of these roll assignments/ and distribution of access rights. It ensures that every employee has access to exactly all the tools and data they need. Nothing more and nothing less.
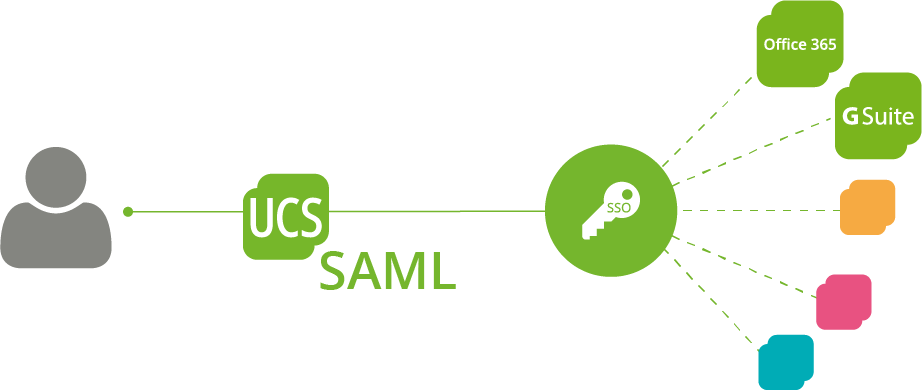
Furthermore, an IdM ensures that all the employees’ data is consistent across the services. So, if you use Open-Xchange as your groupware and add on ownCloud for filesharing, it ensures that both utilize the same e-mail address. Thus, it eliminates the risk of a simple typo in the case of double or triple data entry hindering an employee from being productive. On top of it, the IdM unifies user name and password across the different services and even enables passwordless login through single-sign-on mechanisms.
More Security against Ransomware trough defaults and automatic checks
Additionally, an IdM helps you enforce company policies. Authentication factors, such as password complexity and smart card usage, are the most common ones. However, an IdM also allows more complex restrictions, such as checking the location from which an access is made. It is unlikely that someone physically logs on to a computer from two different continents at the same time. In times of ransomware and hacker attacks, these checks are indispensable to ensure the security of corporate IT and thus the functioning of corporate processes.
Lastly, an IdM might ease the burden on your IT staffs workload. Workflow engines, such as the UCS templates, allow you to preset information, making the creation of a user simple enough, so simple indeed that even non-IT personnel can create them. The same holds true for the bane of every helpdesk — the password reset.

OpenVPN to Secure your Samba Authentications Automatically
Read how to add OpenVPN to an existing Samba 4 installation to automatically secure client authentications over an untrusted network.
Expandable IDM – Open Standard and Connectors for adding additional services
Traditionally, directory services, such as OpenLDAP and Active Directory, have fulfilled and continue to provide the critical features in an IT-Environment. User authentication and authorization are the essential services of these services. However, they do have some crucial distinctions from a more elaborate IdM such as UCS, which in itself contains a directory service.
The main difference is in the provisioning of users in applications. There are nearly hundred applications that the UCS Management Console can provision. Thus, they have a consistent database as mentioned above. However, this feature is not only available for software running on UCS. Thanks to open standards such as OpenID-Connect and several connectors available in the Univention App Center, e.g. for Office 365, Google’s G Suite or the Apple School Manager, countless other third-party and cloud applications can be connected.
Which IDM offers what? – An Overview
Further IdM differences between UCS as competing Offers:
| UCS | Active Directory | Ubuntu + OpenLDAP | Ubuntu + Samba 4 | |
|---|---|---|---|---|
| Directory Service | x | x | x | x |
| Windows Domain Service | x | x | Third Party Application | x |
| Linux Domain Service | x | Third Party Add-In | x | Third Party Application |
| Web Management | x | Third Party Application | Third Party Application | Third Party Application |
| Application specific user settings | x | Few Microsoft Applications | Using Third Party Application | Third Party Application |
| Windows Management Tools | x | x | Third Party Application | x |
| Multi Server Support | x | x | Manual configuration needed | Not Officially Supported |
| Single-Sign On for Server Applications | x | x | Using Third Party Application | x |
| Single-Sign On for Web Applications | x |
Using Third Party Application |
Using Third Party Application |
Using Third Party Application |
| Preset User Templates | x |
Third Party Application |
Third Party Application | Third Party Application |
| Cross-Platform Policies | x | Third Party Application | Third Party Application | Third Party Application |
| Domain Forest | Partly | x | Third Party Application |
Partly |
| Audit Logging | x |
Third Party Application |
Third Party Application |
Third Party Application |
IDM – Introduced Step by Step
Regardless of the benefits, administrators often see the introduction of an IdM as a significant undertaking. However, this does not have to be the case. With a bit of planning, the project can be taken on a piecemeal approach while leaving most of the services and configurations intact until it is desired to migrate them.
Our customer Pennsylvania Dermatologist recently started to renew their IT environment. As this was a working system, any prolonged downtime was not acceptable. At the same time, maintaining multiple instances of the same services was not desired. Thus, for the roughly 100 users across 6 locations, computers and services needed to use the new infrastructure without being replaced themselves.
As this is probably the scenario in many companies, let me introduce you to our path to success:
Step 1: Installation of UCS and import of user data from Active Directory
The first step was to install the new UCS servers. The servers included a Domain controller Master, Backup, and one Slave per location. The initial installation of all the servers ensured that all services could use the final Directory Server and we did not need to touch them more than once to change servers.
Upon completion of the installation, importing users and passwords could commence. Ensuring that the identifiers and IDs remained the same made the migration considerably easier. Using the AD-Takeover/ the AD Connector can provide this right out of the box. Any service or machine connected from now on would be usable for all users. At the same time, to ensure compliance, the import of the policies and settings took place.
Step 2: Migration of the Windows Clients to the New Domain
Lastly, location by location, the endpoints Windows Clients and numerous different medical devices joined the Domain. The clients were touched early, to limit the disruption to the users later in the migration. An additional benefit was that the number of passwords decreased to one, which is used for every login. Basically, there is no technical limitation on when to migrate clients, whether in the beginning, in the middle or as the last step.
You are currently viewing a placeholder content from Youtube. To access the actual content, click the button below. Please note that doing so will share data with third-party providers.
Step 3: Connecting of existing Services to the Domain
Adding the existing services and servers into the new domain was the next step. Windows Servers can join the domain using the Domain Join dialog in the same manner that Windows Clients use it. Once the server reboots, it can utilize all users and accounts present in the domain.
The same holds true for most hardware appliances, including the NetApp Storage and Firewalls the customer was utilizing already. Setting them to use the Windows Authentication in the new domain meant they were ready to go in mere minutes, significantly limiting the interruptions that would have been caused by any migration to UCS-based services.
Software services installed on servers handle very much the same due to the constant usernames and identifiers. The software associated the existing data with the migrated accounts, thereby guaranteeing minimal interruptions of the users. Existing users just have to remember to use their domain password, while new users will be created by the UCS system.
The next steps: Groupware, Migration of File Services, …
Replacing services and introducing new ones came after the initial IdM migration had been finished. Not only allowed this to focus on manageable packages, but it also helped to isolate possible errors. If a sudden change of plan would mean not to replace any services, the environment would still be able to work without any problems with the new UCS servers.
Start Today!
By breaking down the migration into several individual steps, the complexity of the process can be significantly reduced. One can thus quickly reap the benefits of a central IdM. Apart from the speed of migration, there is also a significant business advantage. With a much more manageable project, you can quickly show results for your IT-Department or your customers.
So, start today with planning your migration to an integrated Identity Management System. The implementation can be more comfortable and more rewarding than you think!

