For some time now, the portal with its modern appearance and easy administration has been the central entrance to a UCS domain for users and administrators alike. My colleague Johannes has already described the most important functions of the portal in our article How to Configure the UCS Portal Easily with Drag & Drop. With UCS 4.4, we added some new features which I would like to introduce you to in this article.
In general, the portal is used to deliver the IT services of a UCS domain simply and concisely. Here, external links can be conveniently made available to all users, thus providing a central reference point for all web services, whether intranet or internet. Portal pages can be used, for example, as browser start pages or central service platforms that give users quick and easy access to all services that are important to them.
Designing UCS Portal comfortably with Visual Composer
Using the example of a UCS@school installation, I would now like to explain to you how you can effortlessly carry out the basic configuration of the portal using a so-called Visual Composer.
To access the Visual Composer of the portal page, you must first log in as a user with administrative rights at the top right of the portal page. From version 4.3 v6, UCS@school comes with a preconfigured demo portal that allows you to experience the possibilities of a portal page, which are likewise offered by UCS.
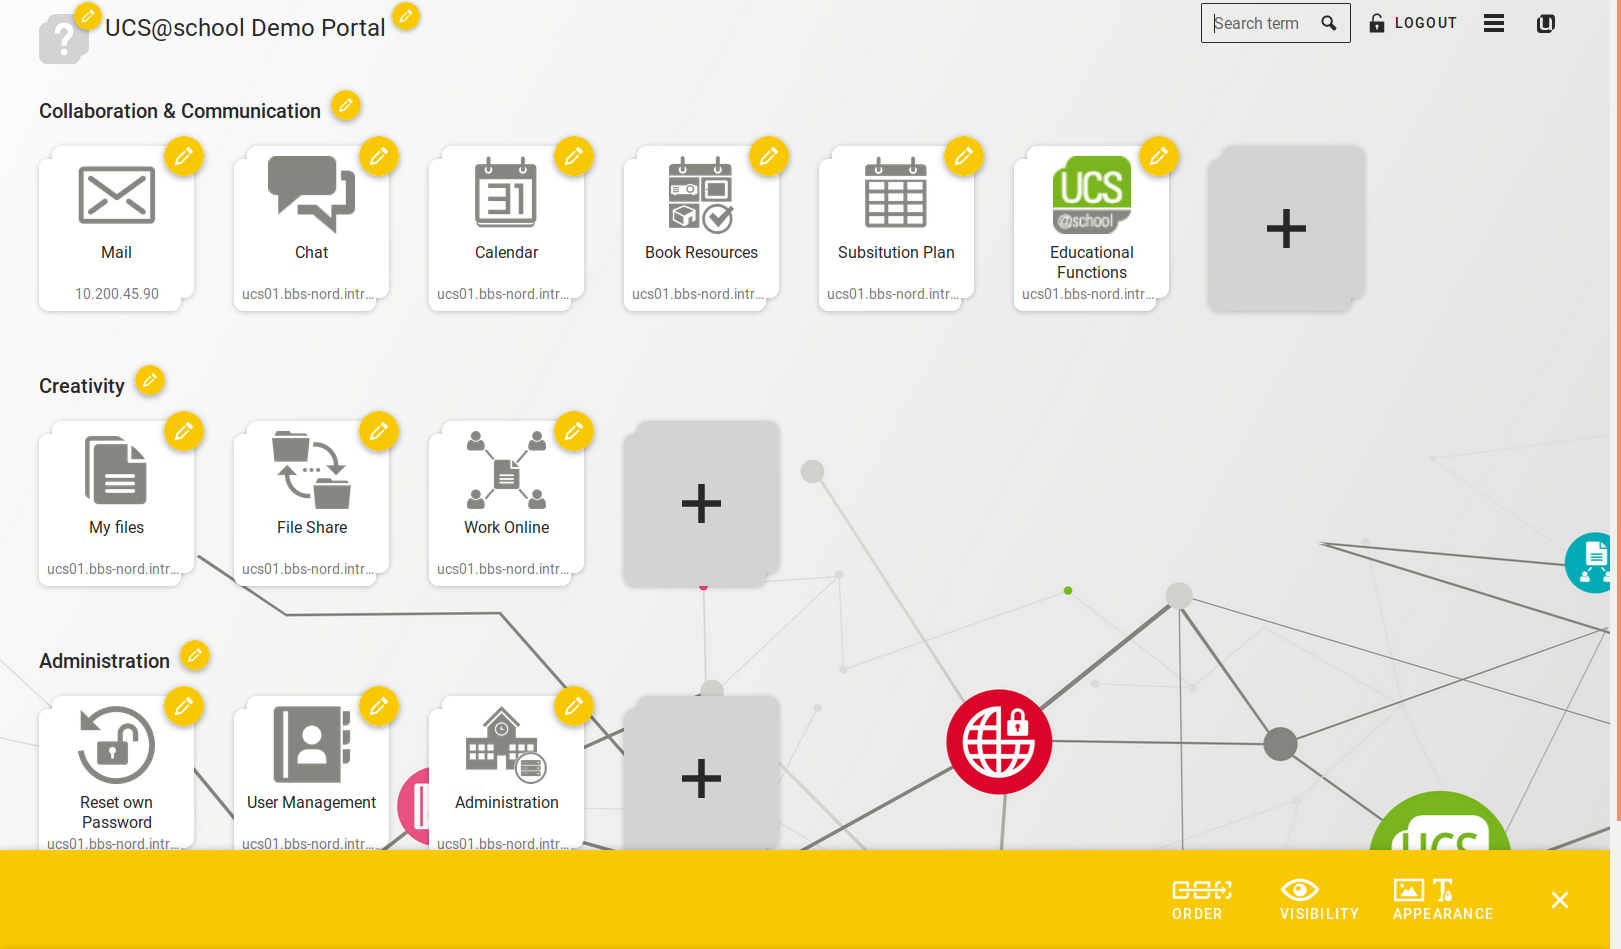
If you are logged in to the portal page as a user with administrative rights, you will see a round yellow editing button in the lower right corner of the portal page. With a click on this button you can start the Visual Composer.
The customizable elements are now marked with a pencil symbol. For example, you can adjust the “page title” of the portal page in the top left corner of the page and upload your own logo, e.g. that of your organization.
Creating your own categories according to your wishes
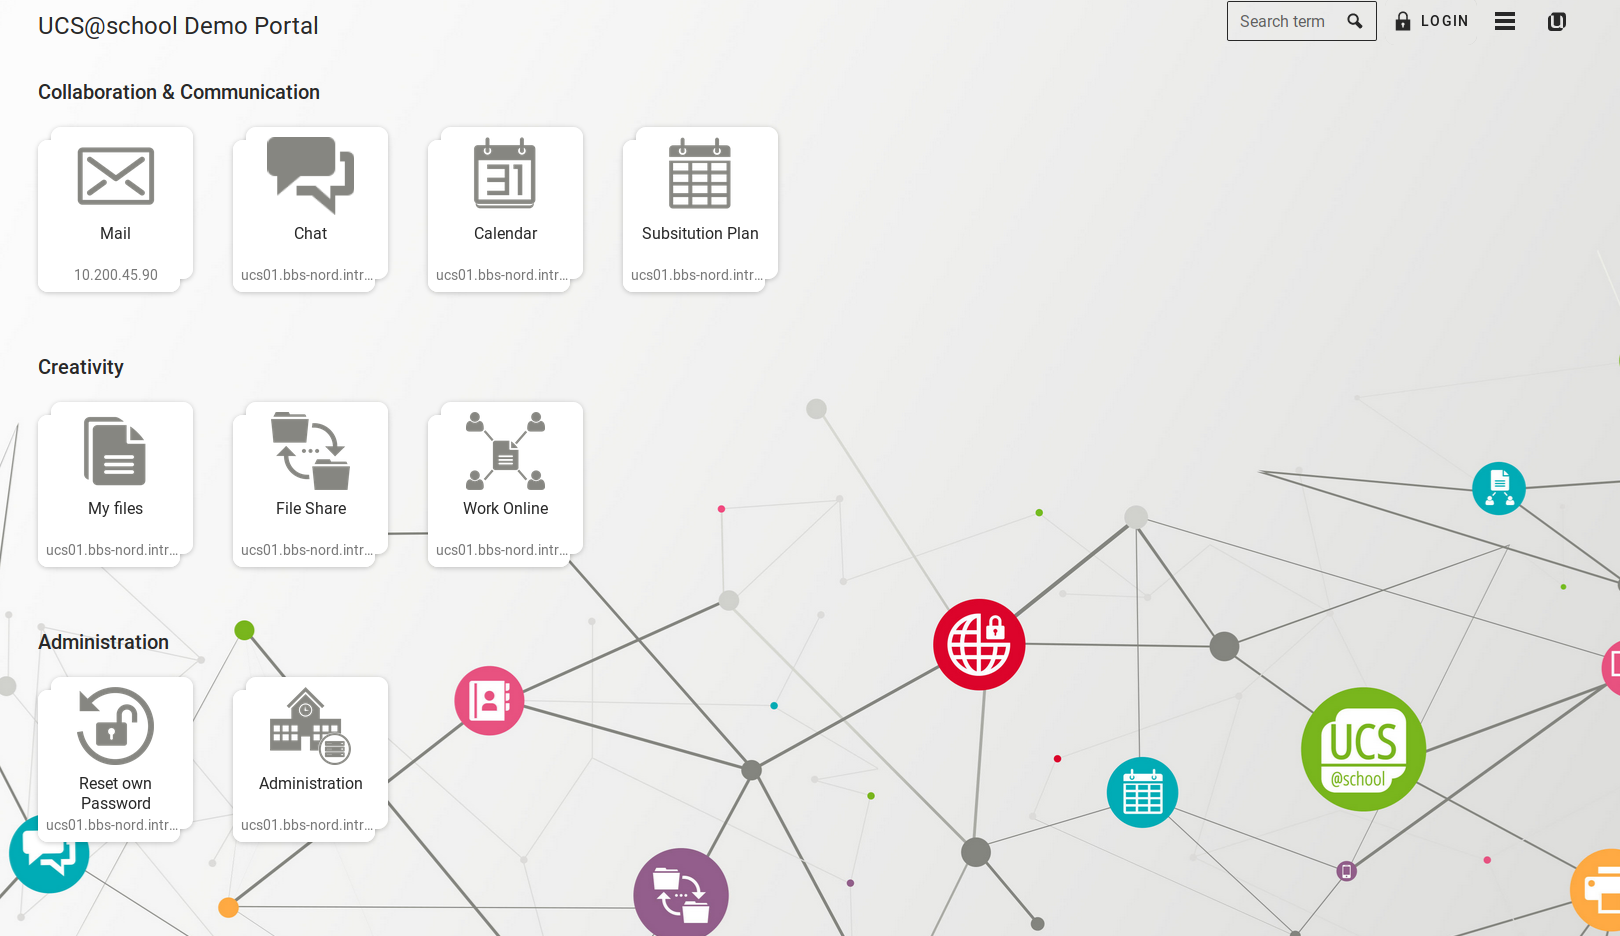
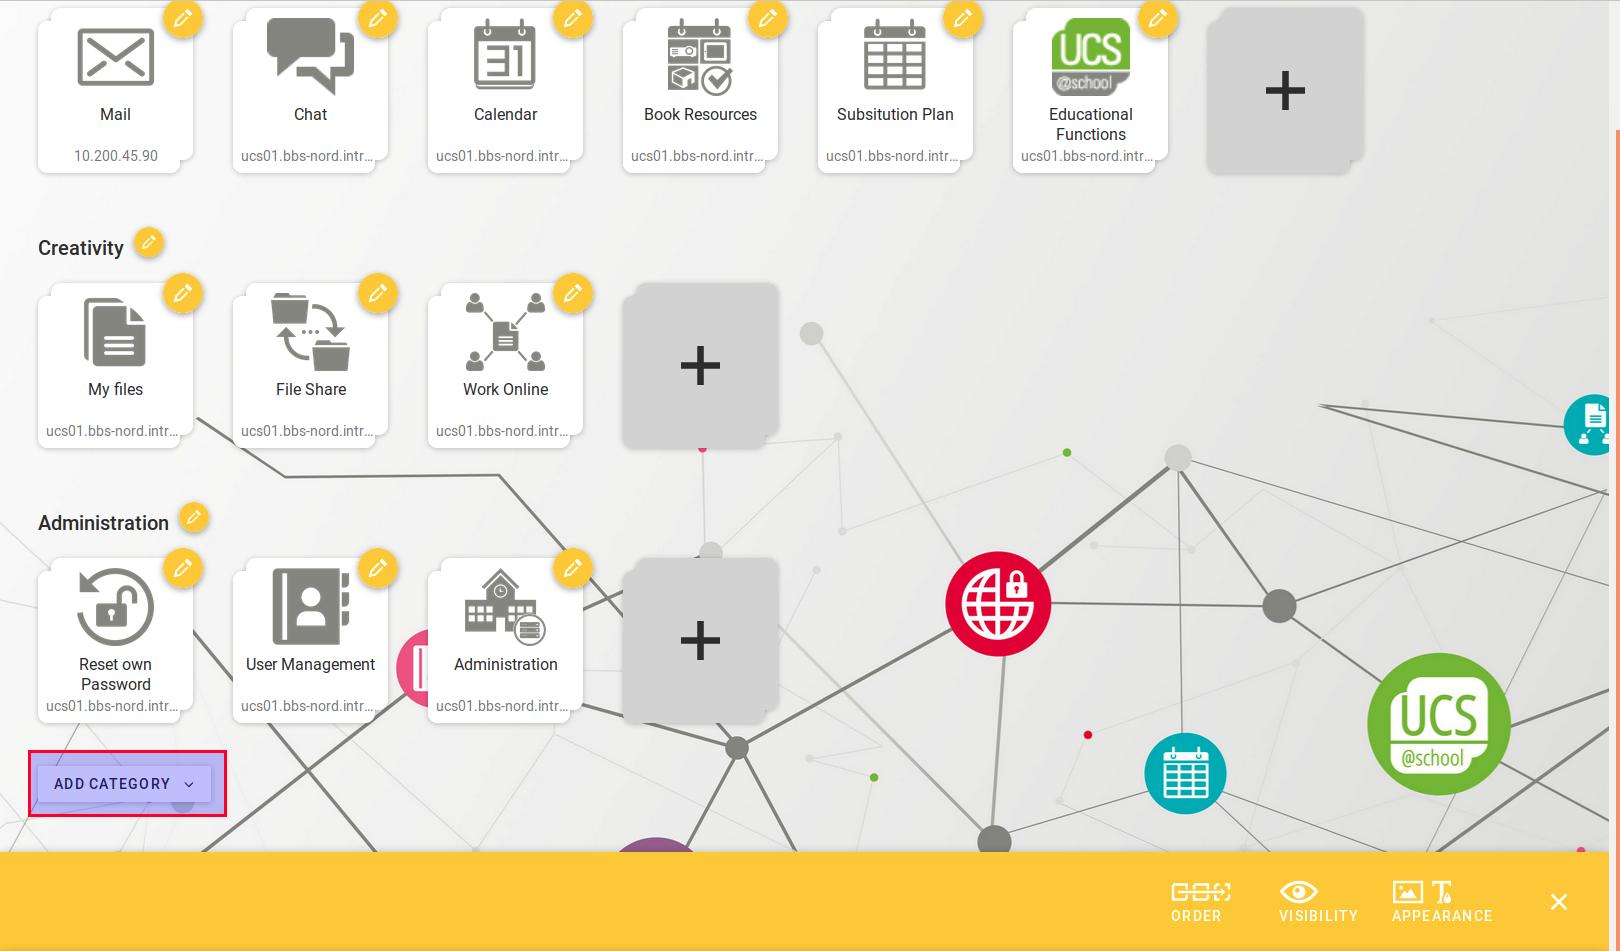
The UCS portal page is made up of categories. In our example these are “Collaboration & Communication”, “Creativity” and “Administration”. To each category belong so-called “Entries”. In our example these are “Mail”, “Chat”, “Calendar” etc., below the category “Collaboration & Communication”. You can adjust the preconfigured categories via the edit button. You can create new categories in the lower part of the portal page using the “Add category” button.
Editing of entries within the categories
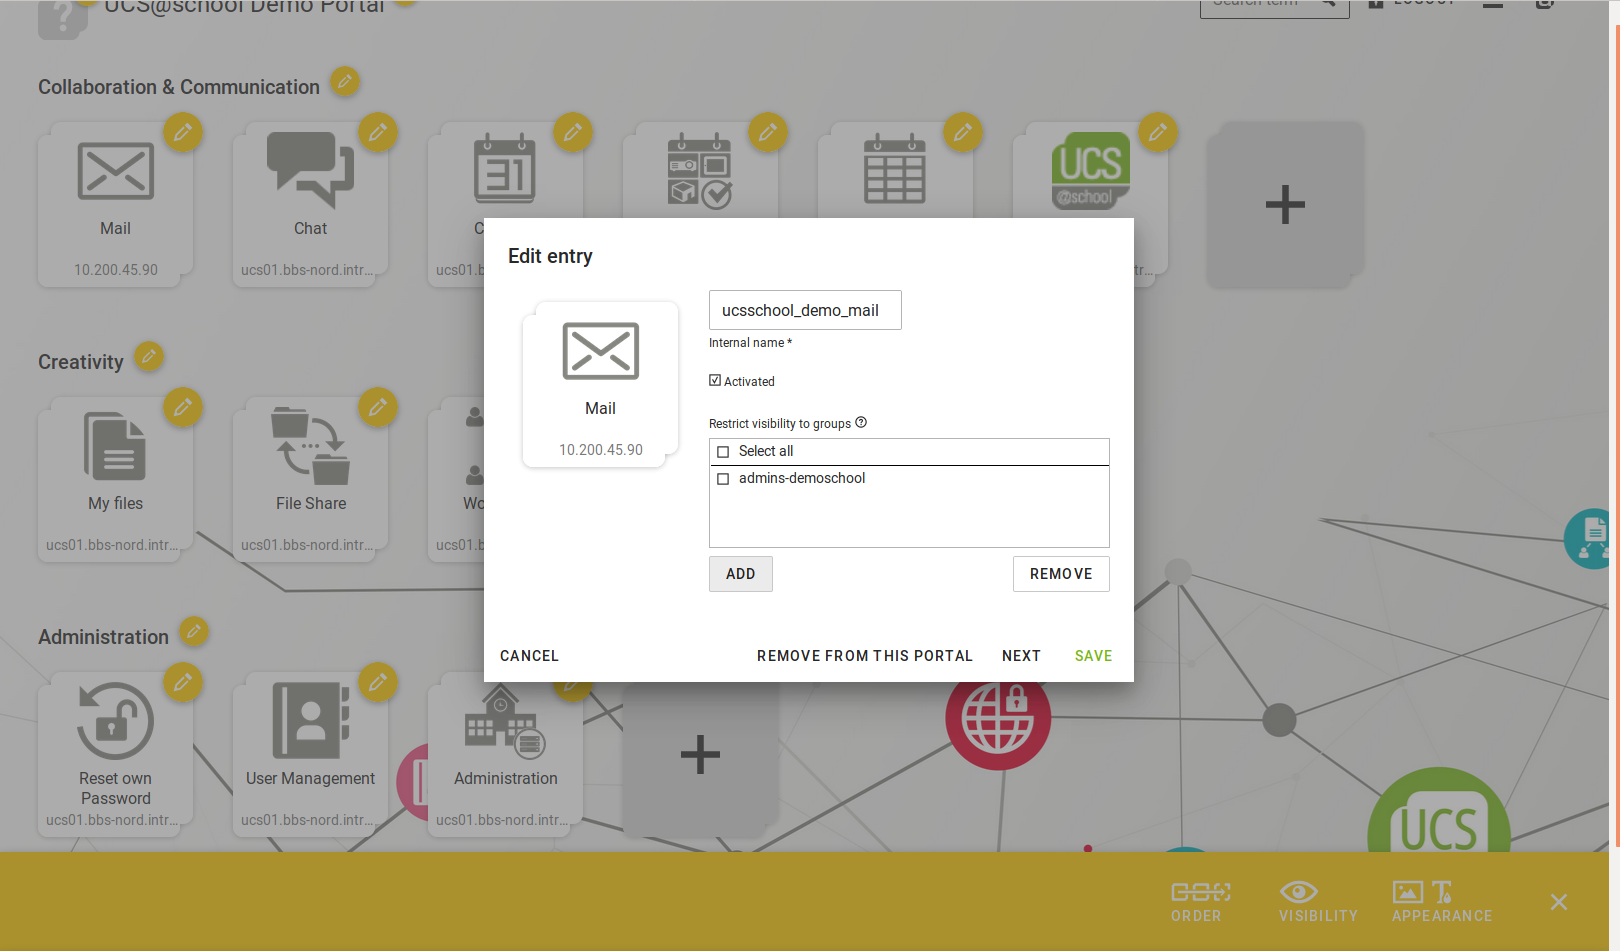
Editing entries is just as easy, as you can do so by clicking on the respective pencil symbol displayed at each entry.
The screenshot shown in the example “Mail” allows you to specify, for example, that this entry is only to be displayed to certain groups. Unauthenticated users do not see the entry. This is useful if you want to distinguish between administrative and non-administrative services and only users with administrative privileges can see specific system services in the portal. This keeps the portal page slim and neat and it can be adapted precisely to the needs of different user groups.
The icon that is used for the entry is also editable, just like the name of the entry, its description and the link behind the entry.
Determining the right portal page for each purpose through the UMC
You can make further settings for the portal page in the UMC under Domain → Portal Settings.
Here you will find a list of all objects related to the portal, differentiated by the type of Entry, Portal or Category. You can use the portal type, for example, to add a new portal or set up local portals for individual servers. You could, for instance, differentiate between a customer or student portal that can be accessed from the Internet and various employee portals for internal use that cannot or can only be accessed remotely under certain conditions.
Using the UCS@school demo portal, I would now like to briefly describe the various settings you can configure on a portal in general.
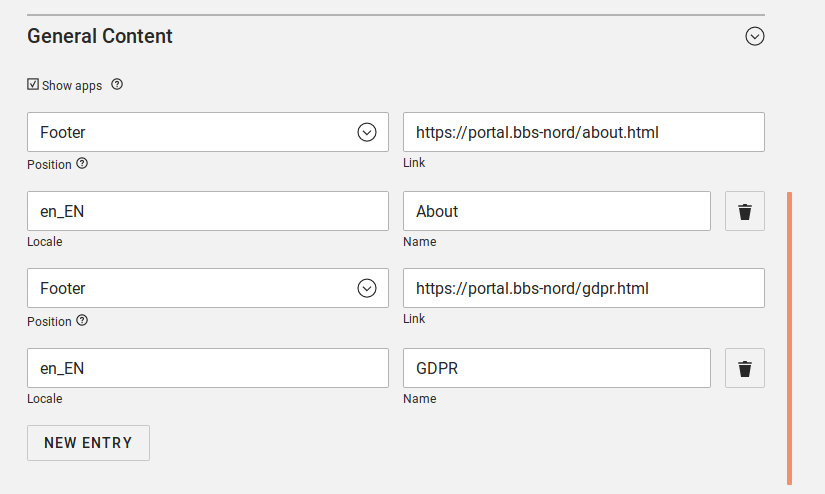
Similar to a footnote, you can also set static links for your portal in the “Footer” of the page, such as an About or GDPR (General Data Protection Regulation) page.
You can store the static links as html files, in this example about.html and gdpr.html, on the master in the directory /var/www/.
These links then appear on your portal page as shown in the screenshot and lead the user to the associated websites.
Under the tab “Portal categories and entries” you will find an overview of the categories and entries of the portal, which you can also move and customize here.
The “Add” command allows you to create new entries for the portal under “Portal Settings” – the same way you use the Visual Composer.
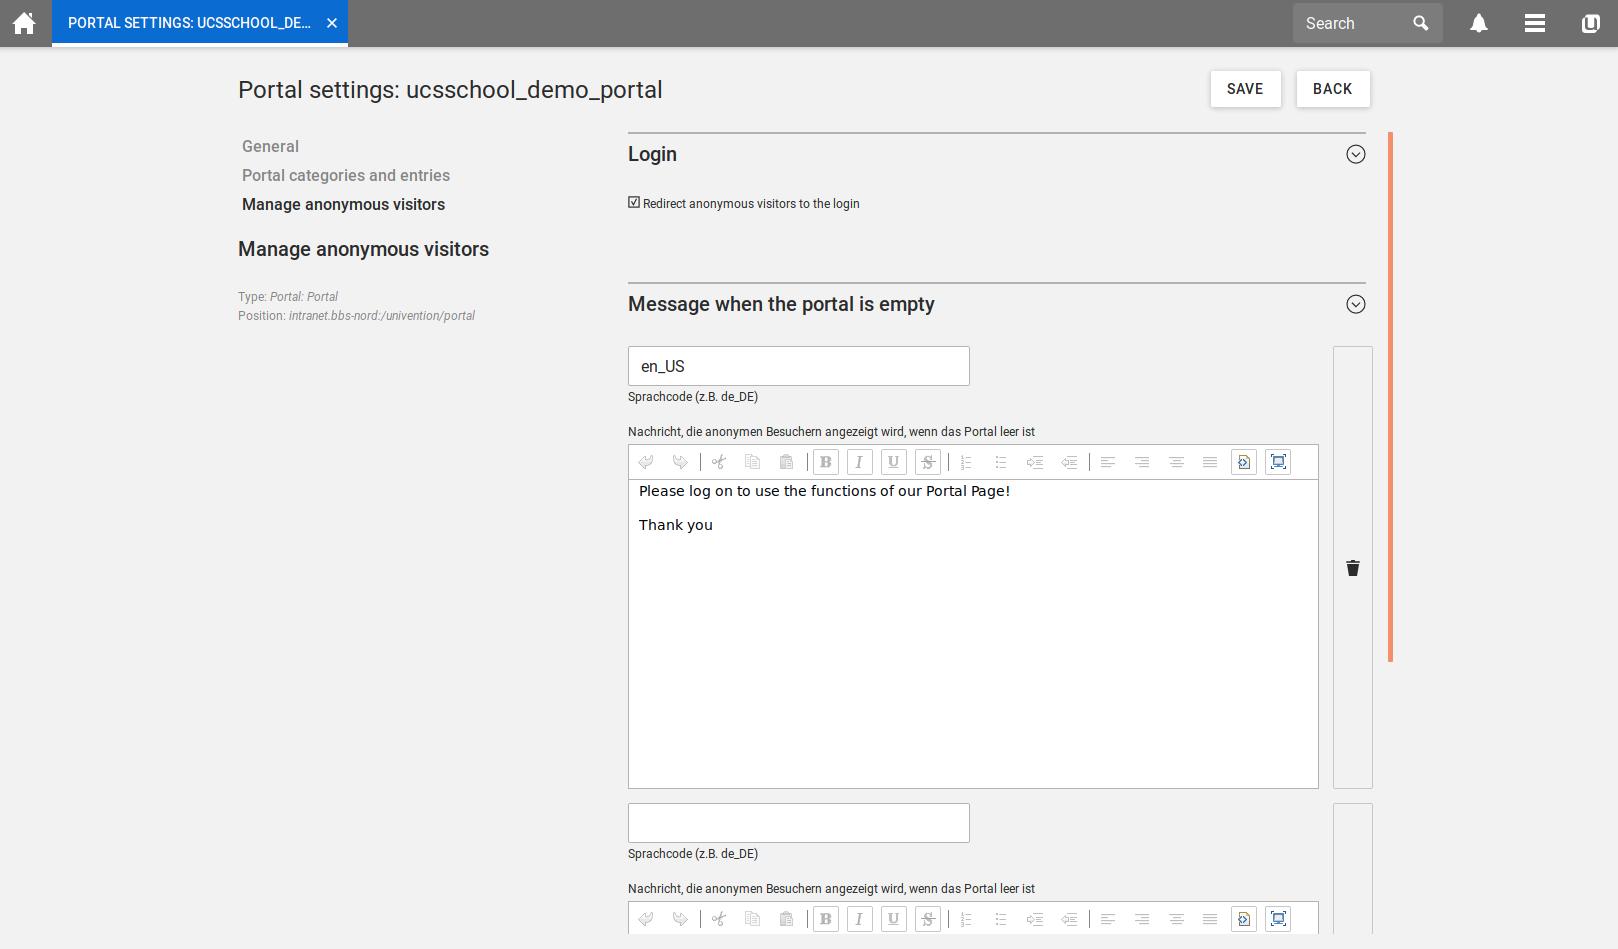
New since UCS version 4.4 is that the handling of anonymous, i.e. not authenticated, users can be adapted. Under “Manage anonymous visitors”, you can force a login by redirecting visitors to a login screen, or display the portal without entries with a notification window requiring them to log in.
The technology behind the portal
But improvements have also been made “under the hood”. Thus, the new technical foundation of the portal enables a better security of the contents on the server side and serves as the expandable technical basis for future functions that our development department is planning.
Also new are additional possibilities to adjust the appearance of the portal via an own CSS. In order to customize the portal even more to your visual requirements, there is the possibility since version 4.4 to make further design adjustments in the file /usr/share/univention-portal/custom.css.By the way, this file is not overwritten when updating to a newer UCS or UCS@school version.
As you can see, with version 4.4 we have significantly extended the portal in terms of functionality and usability and made it easier to log on to the portal. Please do not hesitate to give us your feedback on how you like the new features and where you still see potential for improvement. We are excited to hear from you.

