Do you already know our Microsoft Office 365 Connector? If you use Microsoft Office 365 while simultaneously attach highest importance to the protection of your data, you should definitely try this App.
Working from anywhere has only become possible and effective through the cloud, but the administrative effort involved in integrating and maintaining all users can be horrendous. On top of that, data protection is a delicate issue for cloud services. In this article you will therefore learn how our connector provides a solution and how you can install it easily.
For the visual types among you, we have also recently updated our brief introduction to the Microsoft Office 365 Connector and made it available on YouTube.
You are currently viewing a placeholder content from Youtube. To access the actual content, click the button below. Please note that doing so will share data with third-party providers.
Central control over all identities
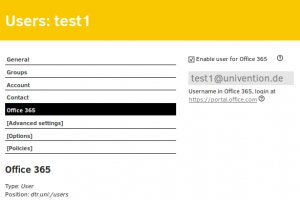
With the connector and the in UCS integrated identity and access management, you can easily manage all users who are using, among other tools, Office 365 centrally in UCS without duplication of effort. This means that you no longer need to create user accounts within Microsoft Azure/Office-Admin. Simply check the relevant user or user group in the UMC and the system will automatically create a Microsoft account for you.
Single Sign-On with authentication via UCS
This app not only saves administrators valuable tim. It also simplifies the lifes of your employees by allowing them to log in conveniently with their usual UCS password thanks to single sign-on. After this login, they can use Office 365 immediately.
The big advantage for you in turn is that all passwords always remain in the company and the authentication of the user against the cloud service is carried out on your own UCS system. Nothing that you don’t want to is transferred to the Microsoft cloud. This is, among other things, also of outstanding importance for schools. Read an exciting field report from the German city of Fulda on this subject:
Automated connection to Microsoft Azure
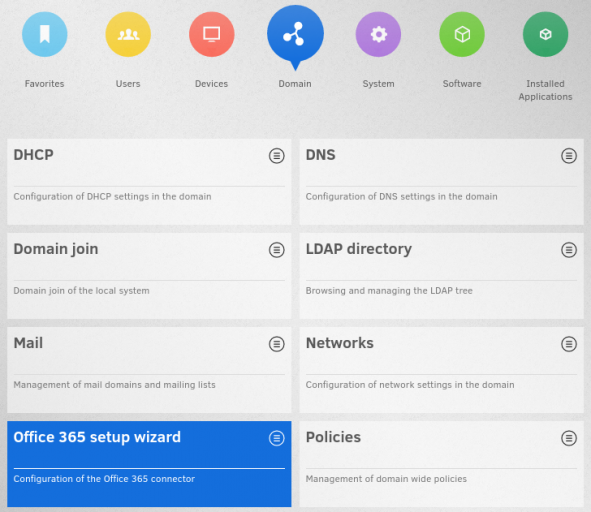
Of course, UCS is only able to provide Microsoft user accounts in the background without administrator intervention after a secure connection to the Microsoft cloud, more precisely to the Azure Active Directory (AAD), has been configured in UCS. To facilitate this, we have built a wizard to guide you step-by-step through the entire process at the beginning of the connector installation.

Only selected attributes of the UCS user accounts, i.e. first name, last name, telephone number, etc. are synchronized from the UCS accounts to the Microsoft cloud. Via the Univention Configuration Registry (UCR), you decide what these are. You also determine there if the values should be anonymized, statically set to a certain value or copied correctly.
Requirements for the installation

If you do not yet have an Office 365 subscription, go to https://www.office.com/ and select “Try for free” at the bottom. It is not possible to connect to UCS with a private Microsoft account. As soon as you have the subscription respectively the test period, log into the Office 365 Admin Center with your Office 365 Administrator account and select “Azure AD” in the left navigation bar at the bottom. A new window will open and take you to the Azure Management Portal. You may need to complete additional registration forms here.
At the end you should now have your own Active Directory in Azure. Select it and navigate to “Domains”. You can add your own domain here and let it verify. To do this, you need to create a TXT record in the DNS for your domain which will take a few minutes.
If everything works successfully, the status of your domain will be displayed as “checked”. Now you can install the Microsoft Office 365 Connector in the App Center and start the wizard. You can choose between the installation on a DC Master or on a DC Backup.
Use of the connector
Once the configuration is complete, you can use the connector immediately. As soon as you activate Office 365 for a UCS user account, a separate Microsoft account is automatically created for this user and provided with a license.
You can view all information on the consumption and assignment of all licenses in the Office 365 Admin Center.
Your users receive the fastest access directly via their own UCS portal page. There they simply click on the Office 365 icon and land directly on the UCS single sign-on page. This saves them from having to enter their user name twice. As already mentioned, the user password is not transferred to Microsoft.
One way sync
The connector only works from UCS to Office. This means that users are only synchronized from UCS to the Microsoft directory and not vice versa.
Note: Changes you made to users in the Azure AD or Office Portal may be overwritten by the connector due to changes made to the same attributes in UCS.
Unfortunately, due to new Microsoft security policies, the connector cannot delete users or groups in the Azure AD. Therefore, if you disable the Office option in UCS, those users will only be disabled and renamed in Azure. All their licenses will be revoked so that they will be available to other users at no cost. Users and groups, whose names begin with ZZZ_deleted_, can be easily deleted in the Office 365 Admin Center.
Important configuration information
Microsoft requires to know in which country the users of the Office 365 service work. The connector uses the “country” specified in the user’s contact information or, if not set, the server’s settings. However, a 2-character abbreviation such as DE can be determined using the UCR variables office365/attributes/usageLocation. For legal reasons we recommend to set this variable.
For those UCS user accounts that have Office 365 enabled, corresponding accounts are created in the Microsoft directory and selected account attributes are synchronized to it. Using various UCR variables, you can configure what is to be synchronized.
The UCR variable office365/attributes/sync is used to configure which LDAP attributes (e.g. first name, last name, etc.) of a user account are synchronized. This is a comma-separated list of LDAP attributes. Remove the attributes from the list that you do not want to synchronize or empty the list completely to not synchronize any data other than the user name.
Changes to UCR variables are only implemented after the listener has been restarted:
service univention-directory-listener restart
Advanced Configuration
With the UCR variable office365/attributes/anonymize comma-separated LDAP attributes can be specified, which are created at Microsoft but will be filled with random values. The UCR variables office365/attributes/static/.* allow you to fill attributes on the Microsoft side with a fixed, predefined value.
With the UCR variable office365/attributes/never you can specify comma-separated LDAP attributes that should not be synchronized, even if they appear in office365/attributes/sync or office365/attributes/anonymize.
The UCR variables office365/attributes/mapping/.* define a mapping of the UCS LDAP attributes to Azure attributes. Normally, you do not need to change these variables.You can enable the UCR variable office365/groups/sync to synchronize the groups of users enabled for Office 365.
If you experience any difficulties, the log file often can help you. Enabling the UCR variables office365/debug/werror will lift debug tasks to the error level and records them in /var/log/univention/listener.log.
More articles that might be of interest to you:
1 Password for All Services and Networks with Single Sign-on


